
A Guide to Integrating Tailwind CSS with Node.js
Learn how to integrate Tailwind CSS with Node.js to streamline your workflow and enhance your web application's aesthetics. Unlock styling possibilities while leveraging Node.js for server-side operations. Let's build stunning web applications together! 🚀
Om TekadeMarch 23, 2024
4 min read
Prerequisites
Before diving into the integration process, ensure you have Node.js installed on your machine. You can download it from the official Node.js website if you haven't already.
Step 1: Initializing the Node.js Application
Let's kickstart our project by initializing a new Node.js application. Open your terminal and navigate to your project directory. Execute the following command:
npm init -yThis command initializes a new Node.js project with default settings.
Step 2: Installing Dependencies
Next, install the necessary dependencies for our project. Run the following command in your terminal:
npm install express ejsnpm install nodemon tailwindcss -DHere, we're installing Express as our web framework, EJS as our view engine, and dev dependencies like Nodemon for auto-reloading the server during development and Tailwind CSS for our styling needs.
Step 3: Configuring Tailwind CSS
After installing Tailwind CSS, initialize it within your project directory by running:
npx tailwindcss initThis command generates a tailwindcss.config.js file in your project root, allowing you to configure Tailwind CSS according to your preferences.Step 4: Configuring Scripts
In your package.json file, add the following scripts to facilitate development and styling: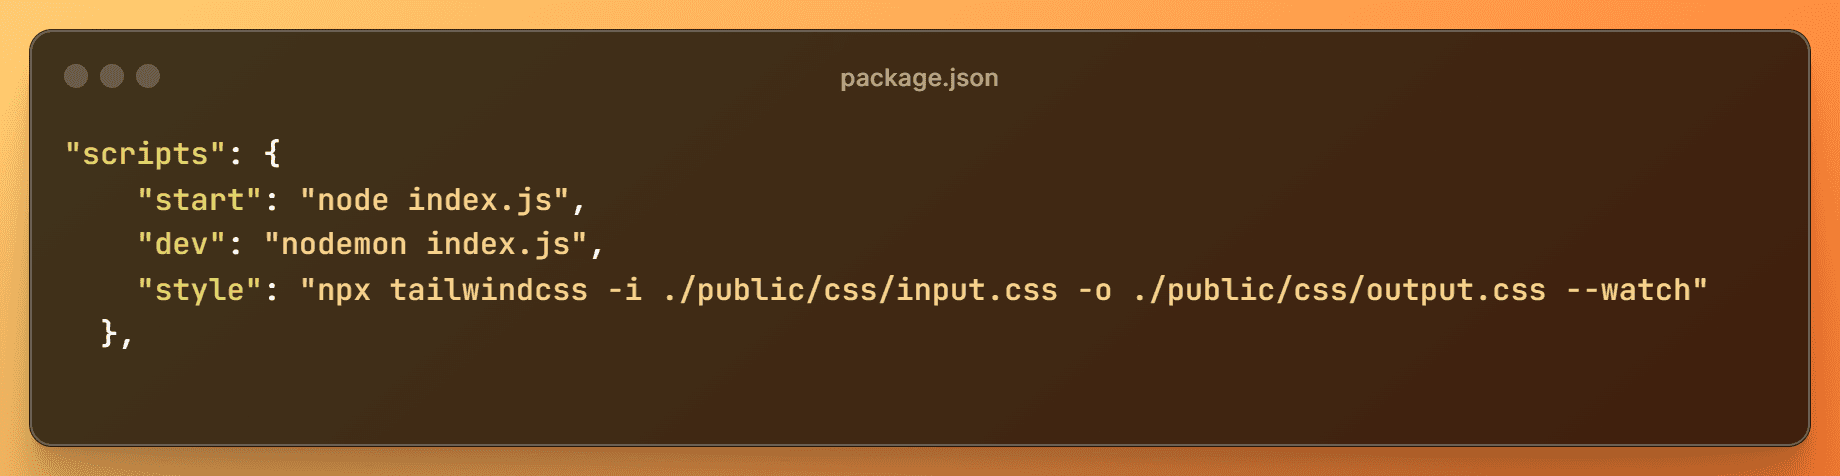
These scripts enable you to start the server, run it in development mode with auto-reloading, and watch for changes in your Tailwind CSS files.
Step 5: Setting Up Project Structure
Create apublicfolder at the root level of your project. Within thepublicfolder, create acssdirectory and addinput.cssandoutput.cssfiles.
Step 6: Configuring Server and Views
In yourindex.jsfile, configure the server to use EJS as the view engine and serve static files from thepublicdirectory. Here's a sample configuration:
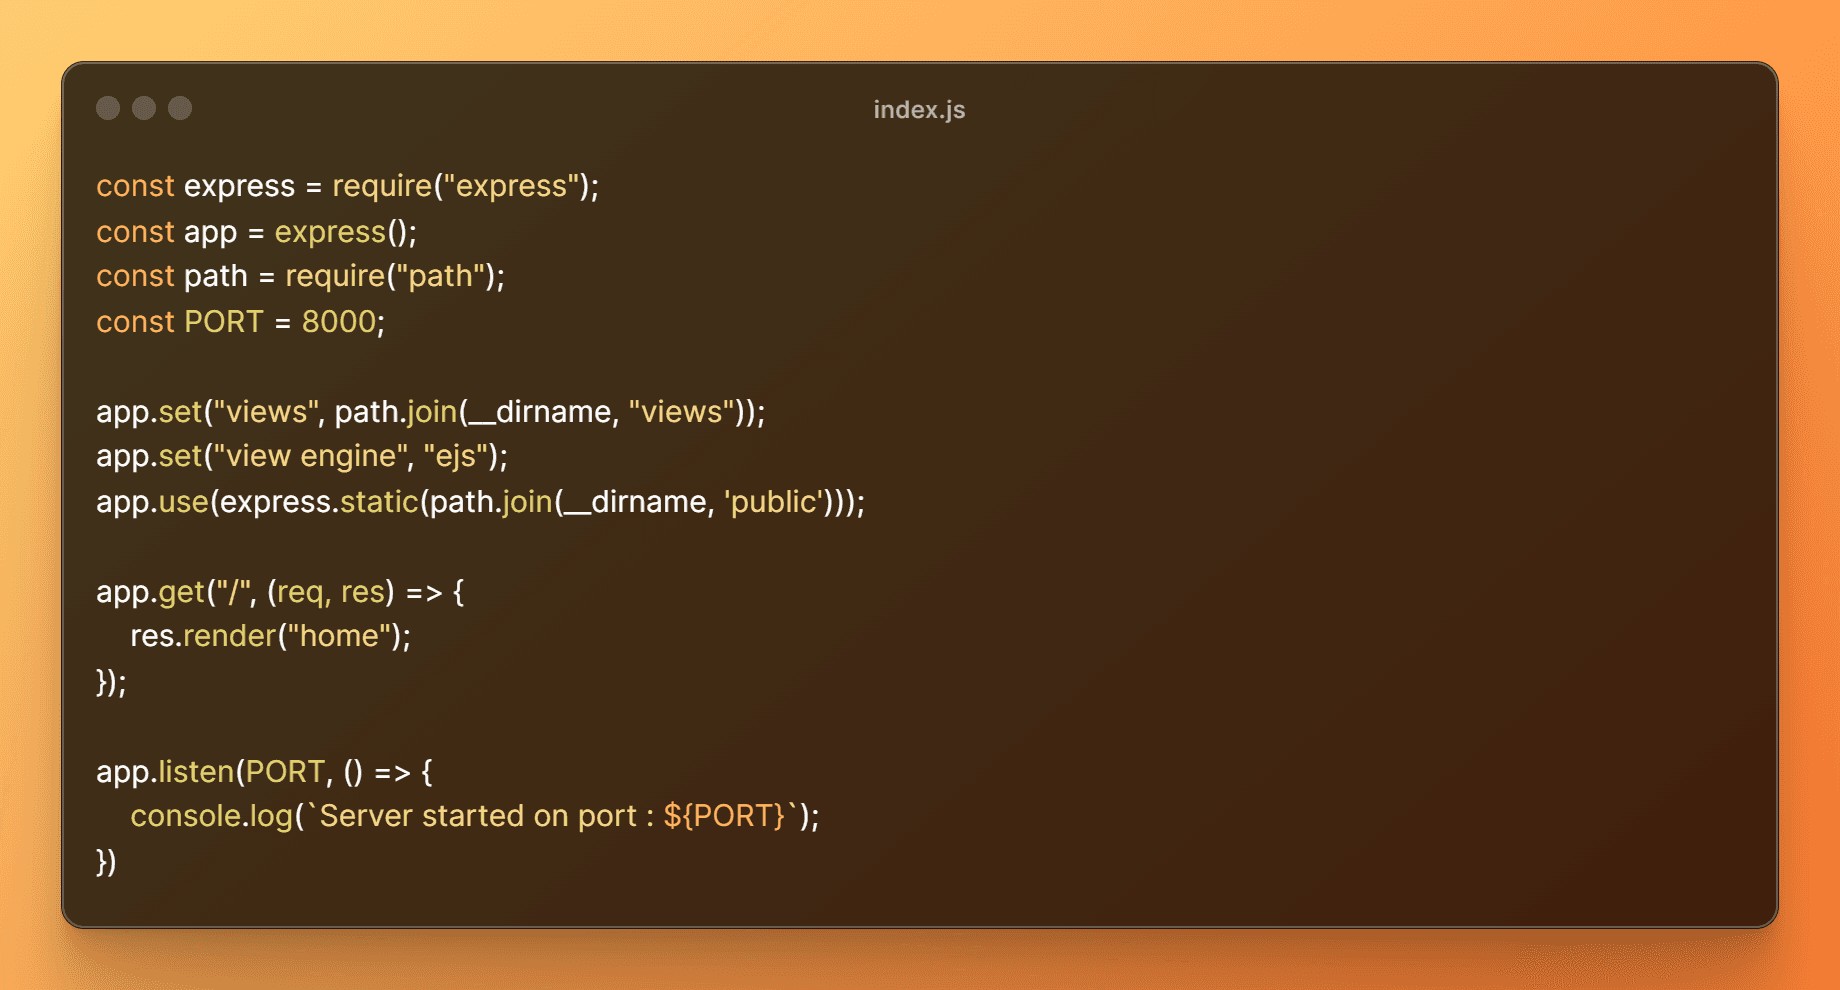
This setup ensures that your server is configured to serve EJS files from theviewsdirectory and static assets from thepublicdirectory.
Step 7: Creating Views
Inside theviewsdirectory, create anhome.ejsfile with the following content:
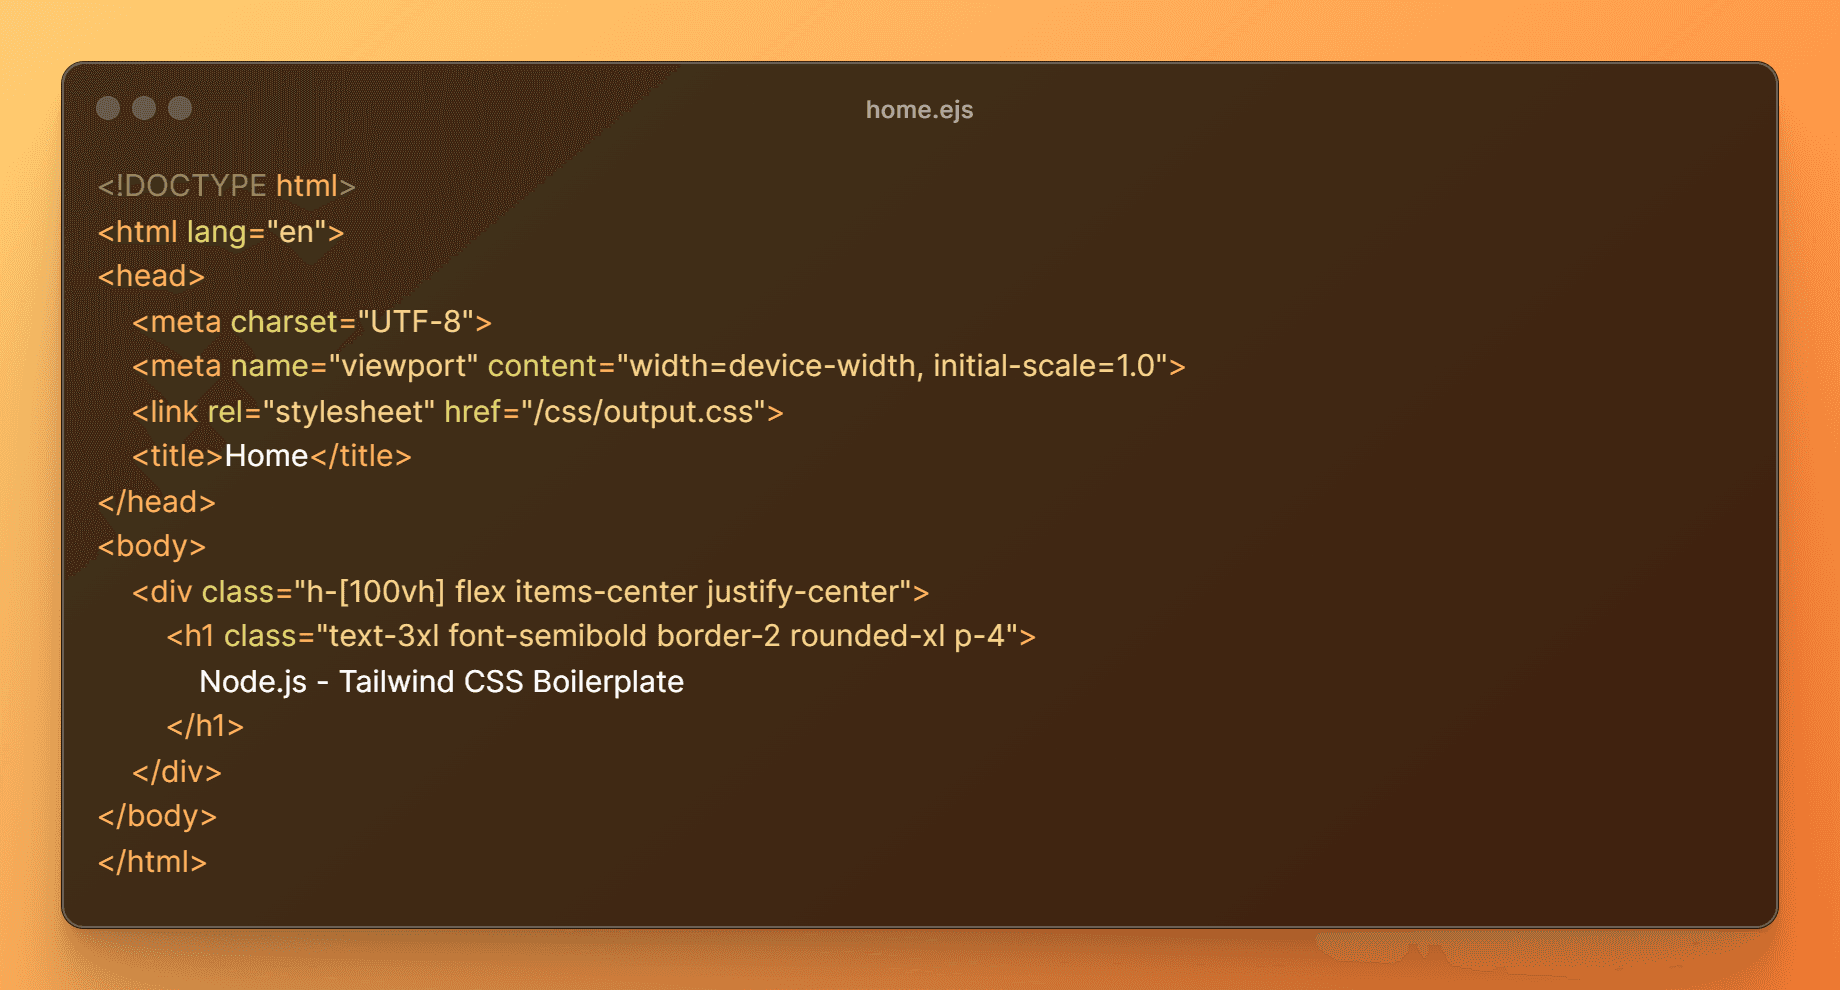
This view utilizes Tailwind CSS classes to style the content.
Step 8: Running the Application
Now, fire up your terminal and execute the following commands in separate terminals:
npm run devnpm run styleThe first command starts your Node.js server, while the second one watches for changes in your Tailwind CSS files and compiles them accordingly.
Conclusion
Congratulations! You've successfully integrated Tailwind CSS with your Node.js application, paving the way for visually appealing and responsive web development. Feel free to explore further customization options and unleash your creativity.
For the complete code and setup instructions, visit the GitHub repository.
Github link : https://github.com/NegativE333/nodejs-tailwindcss-boilerplateClick here